Beginners Guide to YouTube Studio Beta
Day by day, YouTube is adding more features so that creators can work faster, better, and smoother. It doesn’t matter whether you have a new YouTube channel or a very old, you can take advantage of YouTube Studio. Although previously, YouTube added some of the YouTube Studio features to the creator’s arena, you can find even more options after opening the panel. If you are a new YouTuber, who is just starting his/her YouTube channel, you can follow these following guides so that you can know what are the possible things that you can do on before, after and while launching a YouTube video.
How to open YouTube Studio?
Opening or accessing the YouTube Studio is not that difficult. This is as easy as opening a website in your browser. You can just enter https://studio.youtube.com in the address bar to open YouTube Studio, which is still under development.
Download uploaded video
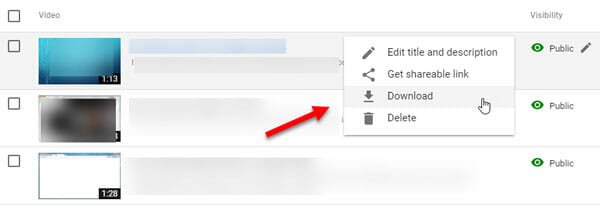
You should always keep the raw video file even after uploading that to YouTube. By any chance, if you have deleted the complete video file, and you want to keep a backup of your uploaded video, you can download a copy of your YouTube video. YouTube Studio has made very easy to download the video. It doesn’t matter whether you have one video or one hundred videos, you can certainly download all the videos with the help of this tutorial. To get started, open YouTube Studio > Videos. On this page, you can find all your uploaded videos. Just hove your mouse over the visibility status, and you will get a three-dotted button. Click on it and select Download. The download will start immediately.
Change video visibility status
By default, YouTube makes all the videos public. However, if you are making a secret course, or you just want to hide a video from the search result, or you want to un-list a video, you can make use of this guide. There are three different options you can choose.
- Public
- Private
- Unlisted
In case you want to make a video private or unlisted, you can go to the Videos section of YouTube Studio, and click on the Public status. Following that, you will get option to select a visibility status.
Check Analytics
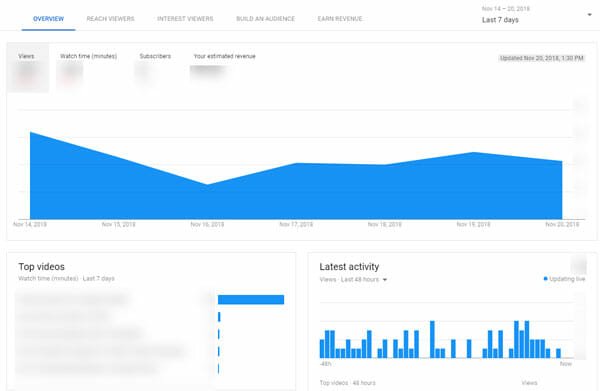
It doesn’t matter whether you have a popular YouTube channel with a million subscribers or you are just getting started with YouTube; Analytics always helps you to grow more. It shows which video is doing well, your watch time, your subscribers count, your estimated earning, your top playlist and more others. If you have ever used Google Analytics, you can find quite similar user interface in YouTube Studio’s Analytics page. From here, this is possible to choose a time frame and analyze everything including visitor’s interest, unique views, demographics and so on. If you have monetized your videos with AdSense, you can also check your estimated earning, earning per video, ad types and more others.
Check Comments
Let’s assume that you have a vlogging channel or how to guide channel and you often share videos related to personal wellbeing, and various solutions. This is obvious that people will ask questions based on your video and their problems. The one of the most used ways is the comment section. If you get a ton of comments every day, you can use this Comments section of YouTube Studio to check comments and interact with your audience. You can know which video has got the comment, what is the comment, how many likes your comment has got and more others. In case, you need to remove any comment, you can do that as well. The options menu comes with these following options-
- Remove comment
- Report spam
- Hide user from channel
- Always approve comments from this user
- Add this user as a comment moderator
You can utilize this option any time and without any problem.
Enable age restriction for a video
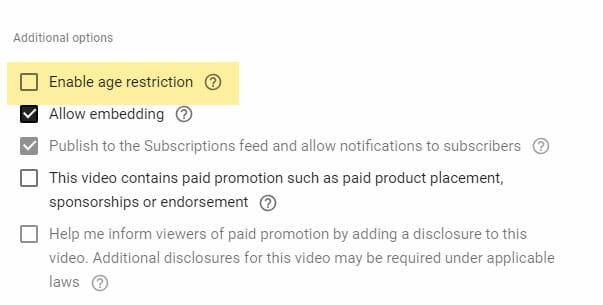
If you have uploaded a sensitive video on YouTube and you do not want to show the video to people under age 18, you can enable the age restriction for that video. While browsing YouTube, you often get a message regarding the sign in to watch the particular video. This age restriction will bring such barrier so that you can serve the video to the appropriate audience. For that, go to the Videos section, and click on any Video. Therefore, switch from the BASIC tab to the ADVANCED tab. In this page, you will get an option called Enable age restriction. You can make a tick in the corresponding checkbox and save the video. It will reflect on your video almost immediately.
Add paid promotion tag
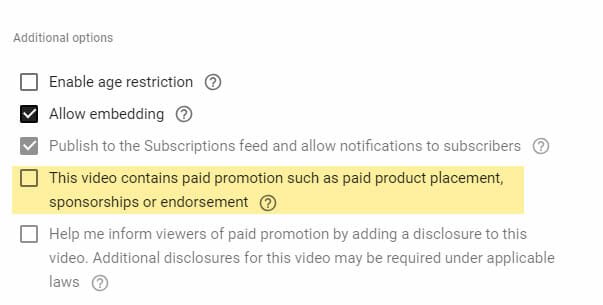
There are many YouTubers who show direct advertisements through video. For example, a company has contacted you, and they want to showcase a product in your video. You can do so and let the users know that it is a paid promotion. Although this is not mandatory, many people do it to make a transparent relationship between audience and admin. In case you want to do it, open the Videos page and click on a video. Therefore, you need to switch from the BASIC tab to the ADVANCED tab. In this page, you should find an option called “This video contains paid promotion such as paid product placement, sponsorships or endorsement.” You can make a tick in that checkbox and save your change.
Use video editor
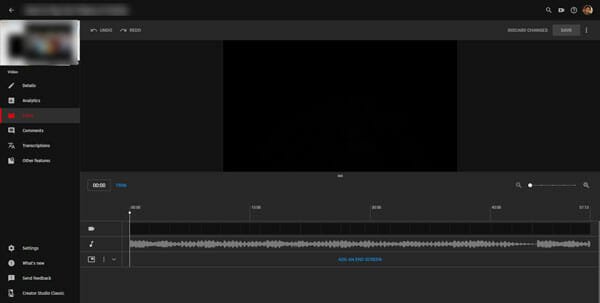
YouTube Studio has a very significant feature, and that is called video editor. YouTube has added a dedicated video editing interface with lots of options so that a beginner can upload video, edit that and show that to the world. It is now very easy to edit a video with the help of this comprehensive video editor made by YouTube. It comes with these following options-
- Add audio
- Trim video/audio
- Add end screen
- Cut video
The End Screen is a pretty useful option that allows you to add other video thumbnail as well as subscribe button at the end of a particular video.
To access this video editor, you need to open a video settings from YouTube Studio and click the Editor button. Following that, you will get all the options mentioned above.
That’s all! In simple words, YouTube Studio is a top-notch update of YouTube for creators. Hope this will help you a lot.
