Magisto Video Editor is Now Available for Windows
Magisto comes first when we talk about best video editors for Android. Magisto is a powerful video editing application, which had been available for Android, iOS and Web. However, now, Magisto is available for Windows PC as well. Although, the requirements of account is remain same yet it has established itself as one of the best video editing software for Windows too.

Magisto has an in-built perspicacity to scan images. This specific comprehension has made Magisto is one of the best video editing tool. With Magisto, you do not have to spend a lot of time to edit everything. A few moments are enough to get things done with the help of Magisto. Magisto’s in-built intelligence helps users to add various effects automatically. This sophisticated video editing is now available for Windows.
Price and Compatibility or System Requirements
It does require a minimum system configuration. You must have Windows 7 or any later version with minimum 1GHz Processor, 2GB RAM, 50MB free hard drive memory and 128MB video memory. On the other hand, the price is same for Windows as it is for other platforms.
User Interface of Magisto for Windows

This is a real piece of Flat design, which is a trending design style for application and web. It has no clutter and overall visual design looks very pleasant. This is where Magisto stands out.
Features of Magisto for Windows
Although, it doesn’t have a ton of features, yet you can add different effects with the help of Magisto. All the features are very compact since it uses its own intelligence to do everything. However, you can add multiple number of images, add music, effects and do more. Read on to know more.
How to edit videos using Magisto for Windows?
First thing first! You should know that this is not actually a video editor as all. Rather, it is a slideshow maker that helps users to turn their images into a beautiful video with various visual effects and music. To get started with this slideshow maker, you must have to pay attention even when installing it since it does require a change. During installation, you will get an option looks like this,

You can obviously, choose Typical installation, which is recommended. However, if you do not want to work hard to gather images after completing the installation, just select Custom (Advanced) and go to next. On the next screen, you can select the image folder by clicking on ADD FOLDER.

This simple change will help you to do everything faster. Anyway, after installing it in your PC, you will be greeted with the start window.
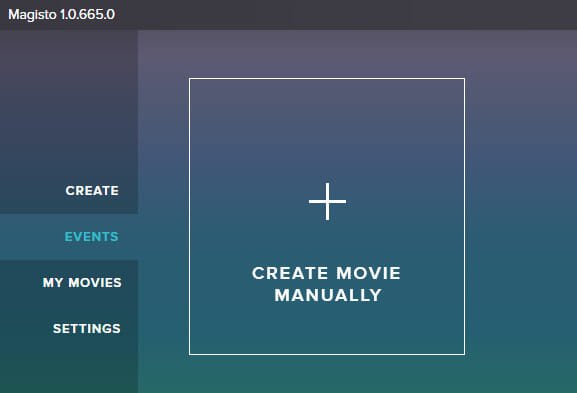
Now, complete the tour, go to EVENTS tab and click on CREATE MOVIE MANUALLY.

Now, you can select footages or images. If you cannot find any footage in the next window, you may have to select them manually. Anyway, just choose some images and go to next.

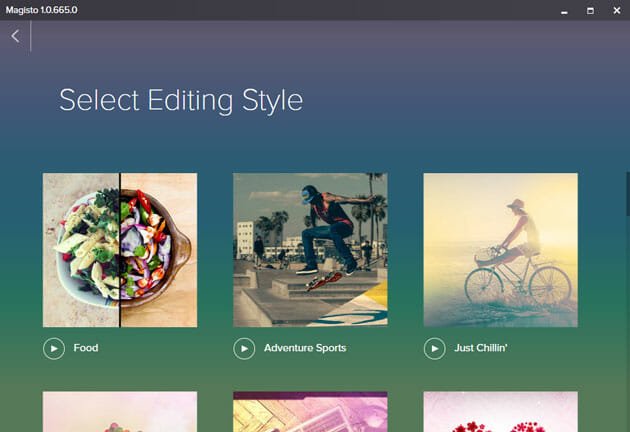
The subsequent window will help you to add editing style or effect. There is more than a dozen editing style. Just choose one and go ahead.

Now, you have to select a music. Magisto already has several audio. You can either one of them or use your own music. To use your own music, just head to UPLOAD YOUR MUSIC and select the audio file.

Now, everything is almost done. You may have to enter a title of your movie.

Just enter a title and click on MAKE MY MOVIE. After that, you will get a screen something like the following picture,

After completing everything, a notification will be popped up on your screen,

Now, you can watch your movie. As usual, to download your movie, you must need premium account.
This is it. Hope this small slideshow maker will help you a lot.

