How To Create Apple ID For Child
Giving a phone to a kid to purchase whatever he/she wants is a terrible idea, and it will affect your child’s behavior. Google Play Store has parental control functionality so that you can block your kid from purchasing something without your permission. Like that, you can use an Apple ID for your child if you have a MacBook or iPhone. Thus, you can monitor what he/she is doing on a computer and mobile. Here is how to create an Apple ID for a child. The good thing is that you can perform the same process from mobile as well as computer.
Why Do You Need To Create An Apple ID For Child?
Apple doesn’t allow children to create an Apple ID when they are under 13 years. That means if your kids want to use FaceTime to call his/her friends or somebody, he/she needs to use your account. Similarly, he/she cannot use other Apple services like iMessage, Game Center, iCloud, etc. If your kid goes to create an Apple ID manually, he/she will confront a warning and error message after filling up the date of birth. However, you, as a parent, can allow your kid to use those Apple services under strict restrictions.
In other words, you can create an Apple ID for your kid with verified parental consent. Not only that but also you can add that account to the family group so that your kid can enjoy other services.
Before you begin, you must know that you have an add a payment method to your kid’s account. If you are ready with will these things, follow the following steps to get the job done.
How To Create Apple ID For Child From iPhone, iPad, And iPod Touch
This is very easy and not much time-consuming. However, you should have the Family Sharing turned on. If you haven’t activated yet, you need to follow the entire guide. Also, you should have an internet connection to get started with these steps.
At first, open the Settings app on your phone and tap on your name. Your name should appear on the top of the Settings page.
Following that, tap on the “Set Up Family Sharing” option. On the next screen, you should get a “Get Started” button. You need to tap on this option.

Then, you need to choose a feature that you want to share with your family members. You will have several options such as iTunes & App Store Purchases, Apple Music, iCloud Storage, Location Sharing, and so on. You can choose anything you want to share. After choosing one service, you need to confirm your Apple account.

You need to click the Continue button to confirm. However, if you want to use a different Apple ID, you need to select the “Use a Different Account” option and enter the credentials. However, you might not get the same options for all the variations you have on the previous page. In other words, the “Use a Different Account” option appears based on the service you select.
Let’s assume that you have selected Apple Music. In that case, you will have to start a subscription to Apple Music. After that, you will get an option called “Create an Account for a Child” on the Apple Music page.

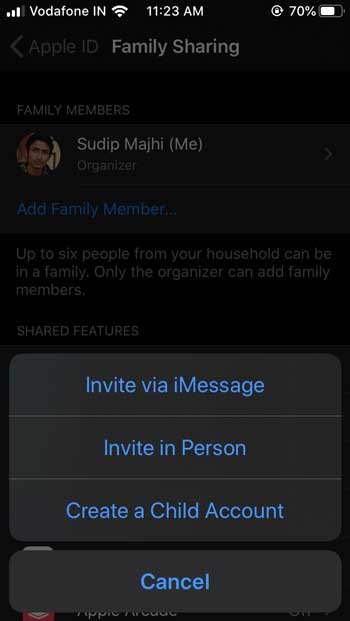
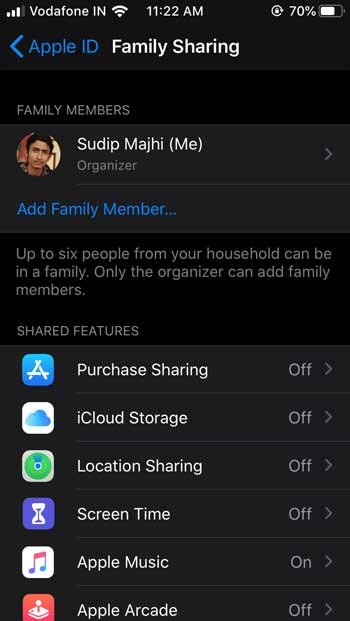
Alternatively, you can go to Settings > Family Sharing. You should find an option called “Add Family Member” on this page.

Following that, three options will appear, and they are:
- Invite via iMessage
- Invite in Person
- Create a Child Account
You need to select the “Create a Child Account” option.

After clicking the “Next” button, you need to enter the date of birth for your kid. Now, you need to verify yourself by entering the CVV of your added Credit Card. Once you do that, it will ask you to enter your child’s name and desired email ID.
Later on, you need to enter a password for that email account and add some security questions.
That’s all! Now you can add that account to your family group, and the account holder can access various Apple services.
How To Create Apple ID For Child From macOS Catalina
If you have a Mac computer, and you want to create an Apple ID for a child from macOS Catalina, you should follow these steps.
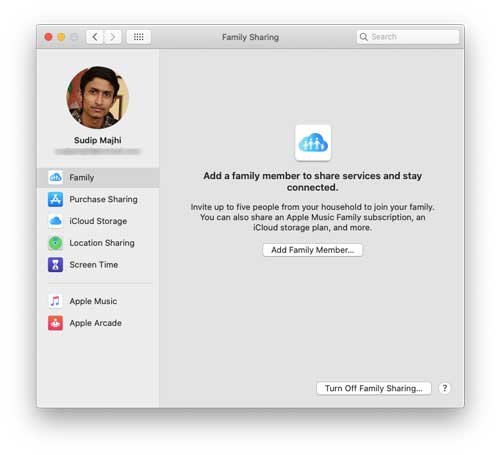
At first, open the System Preferences app on your computer, and click the Family Sharing button. If you have turned on the Family Sharing functionality, you will get an option called “Add Family Member” on your screen.

Now you need to select the second option that says, “Create an Apple ID for a child who doesn’t have an account.”

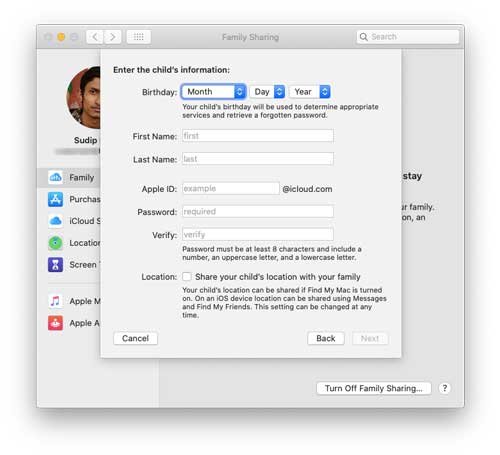
After that, you have to fill up the account creation form where you have to enter the date of birth, name, desired email ID, password, etc.

Also, you have to set some security questions. If you complete all these steps successfully, you should get a confirmation email.
Note: You should not provide all the facilities for your kids at once. You can get started with the Game Center to know how your kids react. Once you are confirmed that your kid is okay with the restrictions, you can lift the barrier.