How to Capture Lock Screen of Windows 10
Alike Safe Mode of Windows 10, Microsoft have kept many other old school features of Window 7/8/8.1 in Windows 10. At the same time, Microsoft have not made any change of different things like lock screen possibilities. For instance, previously, users were unable to capture lock screen and this is not changed in Windows 10. Still nobody can capture either lock screen or logon screen on Windows 10 without using any third party software.
Suppose, you are a blogger and write how-to guides on various Windows tricks. Meanwhile, you have to provide some screenshot to your readers so that they can understand what you want to say or the result of your guide. At the same time, if you’re a regular Windows user and want to show something, what you have added on the lock screen, to your friends, you will have two options.

First, use virtual machine creators like VirtualBox, VMWare Workstation etc. so that you can use main machine’s screen snap feature to capture the virtual machine’s lock screen.
Second, you can use a digital camera or mobile camera.
Both the options seems not so useful, when you need to capture only one screenshot or two. For one or two, there is no need to spend your money on an expensive camera if your mobile cannot capture good photos. Here is the third option that will let you capture lock screen of Windows without having any issue. In fact, you can use any third party software installed in your PC to capture the lock screen of Windows.
How to take screenshots of Windows lock screen?
This is quite simple and not much time consuming. You need to command prompt tool that is called PsExec Command. This is a command line tool, what anybody can use. Download it and unzip it. Therefore, put the PsExec.exe file in your System32 folder that is located at C:\Windows\System32.
After that, open Command Prompt with administrator privilege. You can press Win + X and select Command Prompt (Admin).
After that, run the following command,
psexec -sx cmd.exe
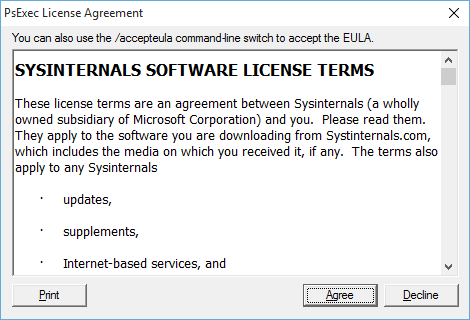
Now, you will get the following screen,

Hit on Agree and your Command Prompt will show this,

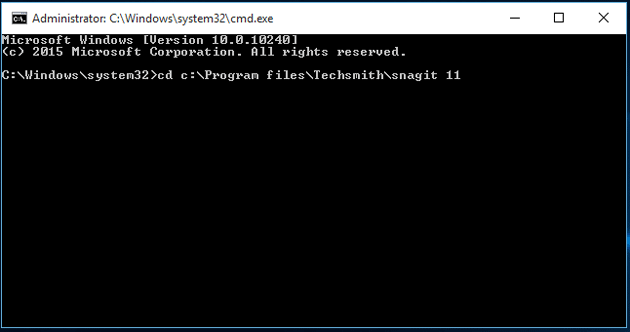
Now, for the testing purpose, press Win + L to go to the lock screen. Here press Alt + Tab to open Command Prompt. Now, you can locate your screen snap app (Windows Snap or any other third party software) to get things done. Do to so, at first locate it using Command Prompt. Suppose, you want to use SnagIt. For that, use the following command,
cd c:\Program files\Techsmith\snagit 11
It can be Snagit 12 if you are using the latest version of Snagit.

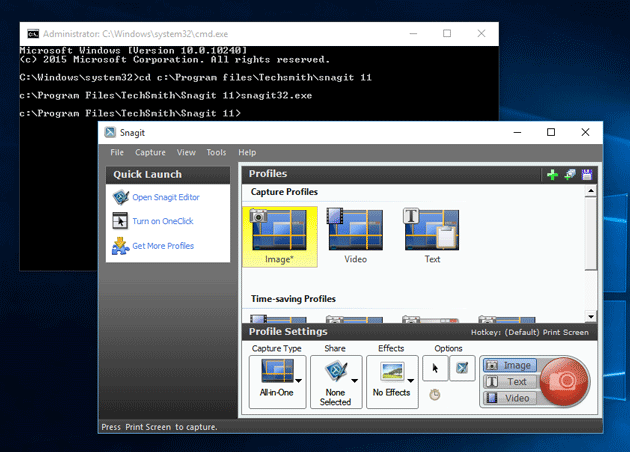
Now, use enter the following command,
Snagit32.exe
to open SnagIt. You will get the SnagIt screen on your lock screen. Using the Snagit window, you can capture screenshots and those screenshots ill be saved in your Snagit Editor.

If you want to use Windows Snap feature, you can use the following command,
cd c:\program files\winsnap
After that, WinSnap64.exe or WinSnap32.exe to capture the screenshot.
Final Word
Instead of using virtual machine or digital camera, this is far better to use this trick to capture lock screen of Windows 10. You will not have to spend a single dollar to do this.
Great article, it helped alot.
Unable to get Winsnap working following your method, as I was unable to save the screenshot and had to forcefully kill the application as it became unresponsive.
This worked for me.
psexec -sx “C:\Program Files\WinSnap\WinSnap64.exe”
You have simple and straight forward explanation and we are also benefiting from your ideas and looking to have the same discussion on to other related subjects specially to share with us your experience from Financial and business expansion point of view.
www.trust-ci.com