How to Enable MAC Filtering in Any WiFi Router
Nowadays, we use WiFi more than Cellular data connection. This seems cheap and affordable. One internet connection can help you to connect to the web through your all devices. No matter if, you have mobile, laptop or tablet. You can use internet using one WiFi router and single data connection. WiFi router is a must have gadget that every geek should has.
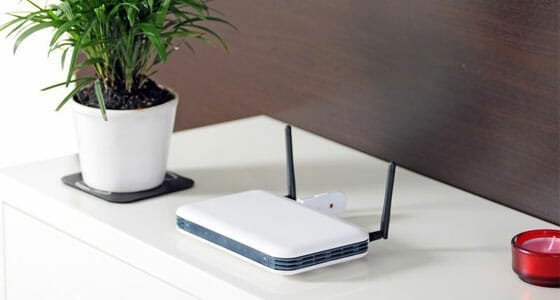
If you use WiFi router, you should also know about positive sides as well as negative sides of a router. Actually, it doesn’t have so-called negative sides. All you need to do is just securing your WiFi router so that others cannot use it in your absence. If you need really secured WiFi router, do check out KeeWiFi.
You can do several things to make your router more secure. Among all of the essential steps, Mac Filtering is the most significant thing you should activate.
What is MAC Address?
First thing first. MAC Address means Media Access Control Address and it doesn’t have any link with Apple Mac. A MAC Address is usually used as a distinctive identifier for the physical network area which include Ethernet, WiFi and so on.
After you connect to the internet via any kind of Ethernet connection or WiFi Router, your mobile or PC generates a new and unique MAC Address. As opposed to IP address, it doesn’t alter with different data connection type.
What is MAC Filtering?
This does what it says. MAC Address Filtering is an in-built feature that is provided by every WiFi router. You can block third party devices from connecting to your WiFi Router even after spying on you.
How to find MAC Address of my device?
This is very simple. You can find that after connecting to any WiFi router.
If you are using Windows PC, head over to this link to learn how to find MAC address.
If you are using Android, do follow the following steps;
Step 1: Turn on WiFi and connect to your WiFi router.
Step 2: Go to About Phone section and tap on Status. Now, you find Wi-Fi MAC address.
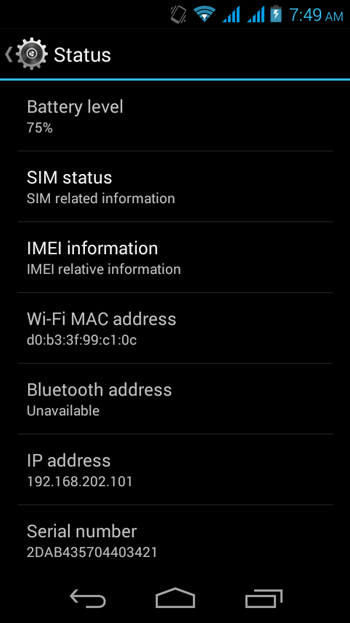
That’s it!
If you are using iOS 7 or iOS 8, do follow the subsequent steps;
Step 1: Go to Settings.
Step 2: Tap on General and About respectively. Now, you can find MAC address under WiFi Address.
That’s all!
In this way, you can find MAC address of all devices.
How to Enable MAC Filtering?
Today I am going to show you how to enable MAC filtering in D-Link router. But, you can do the same on any router.
Anyway, here are the steps.
Step 1: Sign in to the router’s dashboard. Generally, it is 198.168.0.1
Step 2: Go to Advanced tab.
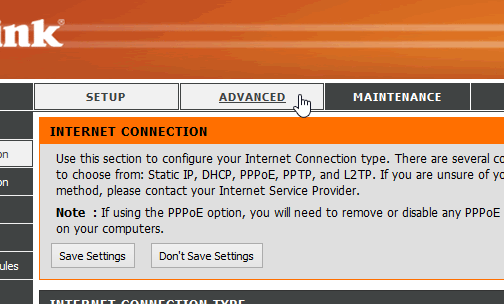
Step 3: Click on MAC Filtering from the left pane.

Step 4: Expand the drop-down menu and select Turn MAC Filtering ON and ALLOW computers listed to access the network.
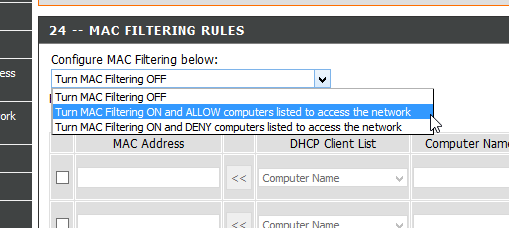
Step 5: Now, enter MAC address in the respective empty box.
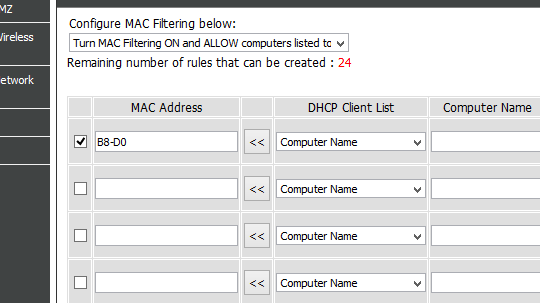
That’s it! Do the last step very carefully and don’t forget to save your changes.
P.S.: If you do the last step incorrectly, you may have to reset your router to make any change in the future.
Hope this tiny change can help you to save bandwidth and money.