How to Create an “Email This Post” Widget For Your WordPress Blog
You must have seen some “Email this page” widgets on various blogs which allows blog readers to recommend a webpage to anyone via email. There are also some WordPress plugins available, but I am not a big fan of any of them due to two reasons.
First, I rarely use any WordPress plugin if the same thing can be used using static HTML codes. Second, the widgets are not very customizable and in most of the cases, they don’t offer any branding as long as you are on the “Free” plan.
Here is a step by step tutorial to create an “Email this post” link for your WordPress blog template:
Example and Working of Email this post Widget
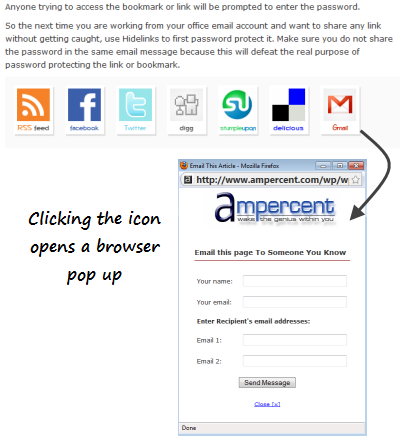
On this blog, I have a widget placed just where the article ends (look for the Gmail icon at extreme right). Clicking the icon opens a small pop up Window where the reader can type his own email address and the email address of the friend whom he wants to refer the blog post.
After entering all the required fields, when the user clicks “Sends Message”, a link to the blog post is sent to his friends email address. You will also receive a notification email that someone@example.com has referred a post of your blog to someoneelse@example.com
Using this widget has an advantage – the users who are not tech savy and do not use Facebook or Twitter can email an article directly from my site.
Steps To Create the Widget
Here is a step by step tutorial which will let you create an “Email this post” widget for your WordPress theme:
1. First download this package which contains all the necessary files required for the working of the widget. Extract the package and you will get 3 files – recform.php, tellafriend.php and thankyou.htm.
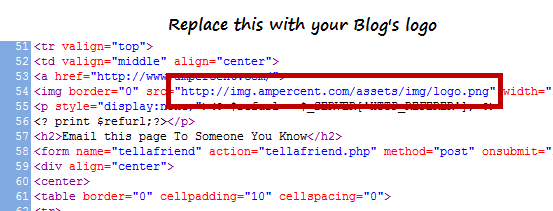
2. Open recform.php in an HTML editor or notepad. This is the file which is shown in a pop up window when someone clicks your “Email this page” icon on a blog post. Go to line 54 and insert the URL of the logo of your blog, as shown below

3. Open tellafriend.php in an HTML editor or notepad, go to line 10 and enter your own email address.

This is the address where you will receive notification email when someone recommends a post of your blog.
4. Open thankyou.htm in an HTML editor or notepad, go to line 14 and enter the URL of your blog logo.

You can also change the Title of the page and enter your Blog’s main title or any other message.
5. Save all the three files and upload them to the same directory of your WordPress theme. All the three files should be in the same directory where you have the file of the calling page – in this case it’s single.php.
6. Open your theme’s single.php file and add the following code wherever you want the “Email this post” icon to appear.
- In the above code, enter the location of your theme in the first line at /wp-content/themes/yourtheme/recform.php. Do not enter the complete address of the theme directory. Example: If your site’s theme directory is www.yoursite.com/wp-content/themes/abc, you have to enter wp-content/themes/abc/recform.php.
- In the end, enter the location of the image which will be shown for “Email this post”. You can delete the entire <img> HTML tag, if you want to use a simple text link.
You can further customize the icon using CSS, this depends how you want to position it and go with the design of your blog.
7. Save the single.php file and upload it back to your themes directory. You are done.
Now your blog readers will be able to recommend your blog posts to anyone via email. To customize the email template, you have to edit some portions of tellafriend.php.
Demo
Here is a quick video demo of the entire procedure
Do let us know if you need any help to install the “Email this post” widgwet in your WordPress theme
More tips:
1. How to create a Bookmark this page link for WordPress
2. How to create a Tweet this button without any plugin
