How To Change Video Quality On Netflix, Hotstar, Amazon Prime
Nowadays, people use online streaming sites more than going to the theater to watch a movie. There are several advantages of having a subscription on various video streaming sites. If you often use and watch videos on different sites, but you do not know how to change video quality on Netflix, Hotstar, and Amazon Prime, here is what you can do.
When it comes to the best online video streaming site, you cannot just opt for one since you cannot find all the movies and TV shows in a particular place. That is the reason why you need a subscription on multiple sites such as Netflix, Amazon Prime, etc. If you live in India and you want to watch some local content, Hotstar is probably the best choice. On the other hand, if you’re going to watch the world’s best movies, top-rated TV shows, etc., Netflix will be the perfect option for you. Likewise, the Prime Video or Amazon Prime is pretty good if someone wants to watch US content as well as documentaries.
It doesn’t matter which service you choose; you must have a good internet connection to watch any show or movie on those sites. If you use higher quality, you need to spend more bandwidth and vice versa. Thankfully you can find the option to change video quality on all those sites. That means if you have a limited data connection, but you want to watch a particular part of a movie or TV show, you can watch that without consuming a lot of bandwidth. The following step by step guide will let you know how you can make the change.
Before getting started, you should know an important thing. Let’s assume that you are watching a video on Hotstar on your mobile, and your mobile has a 720p display. That means you can get a maximum output of 720p. As your phone doesn’t support 4K or 1080p content, you cannot watch the video in such a resolution.
How To Change Video Quality On Netflix?
Netflix has quite an attractive pricing and settings. You can watch HD or Ultra HD videos only if you have a Standard or Premium account. That means if you have a Basic account on Netflix, you cannot view movies or shows in HD. Therefore, before getting into the settings, you should know which plan you are using. After that, you can follow the following steps to change the video quality permanently in your account.
At first, open the Netflix website and sign in to your account and go to the Settings page. Here you should find an option called Playback Settings. Click this button.
Now you can find four different options if you have the Premium account. However, the Standard account holders will not get the Ultra HD option, and the Basic account holders won’t get the Ultra HD and HD option in the list. Talking about options, you can find some options like these-
- Auto: if you select this, Netflix will stream video according to your internet connection speed.
- Low: You will get very basic quality, and as per Netflix, it consumes around 0.3 GB bandwidth per hour.
- Medium: It is 720p resolution, and according to Netflix, it consumes around 0.7 GB bandwidth per hour.
- High: it is the best output. If you have a Standard account, it will stream video in 1080p, and if you have a Premium account, it will stream video in 4K. As usual, the bandwidth consumption will be very high, and this is not recommended for cellular data users or limited bandwidth users.

Under the Playback Settings, you need to choose an option based on your requirements and click the Save button to confirm the change.
How To Change Video Quality On Hotstar?
It is straightforward to change the video quality on Hotstar. The best thing is you do not have to go through a lot of options to make the change. Another useful thing is you can change the video quality for every video. To improve the video quality on Hotstar, you can follow these steps.
At first, open Hotstar and play a video. After that, click the settings gear icon that is visible inside the player. You can find an option called Quality. Under that option, you will get some video qualities such as Auto, Low, Medium, High, and Full HD. You can choose any option as per your wish.
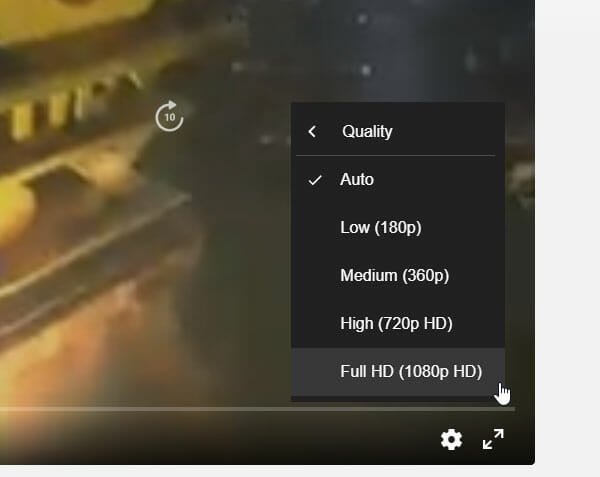
After that, Hotstar will start playing the video in that quality only.
How To Change Video Quality On Amazon Prime?
Like Hotstar, you can change the video quality for each video on Amazon Prime. The only difference is the name of options are not the same as Hotstar. To get started, open the Amazon Prime website and play a video. After that, click the settings gear icon and choose an option among Good, Better, and Best.
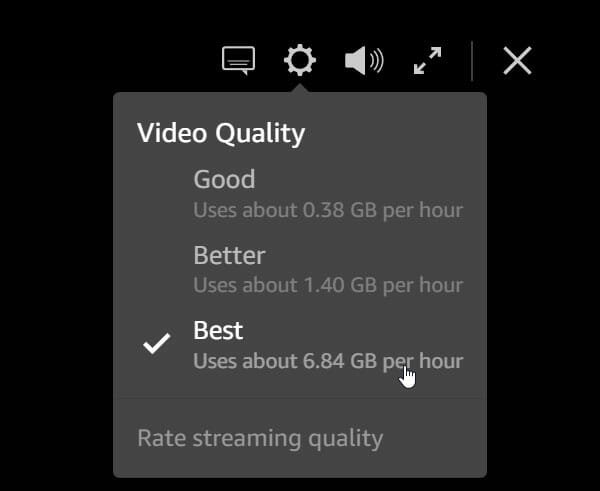
As the names suggest, if you choose Good, it will consume the least bandwidth, and if you select Best, it will drain the most bandwidth.
How To Change Netflix Video Quality On Android And iOS?
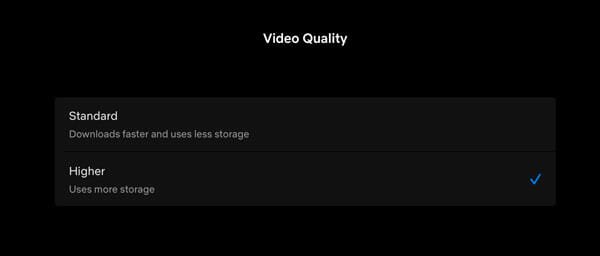
To change the Netflix video quality on your Android or iOS mobile, you need to follow these steps. At first, you need to tap on the More button and go to App Settings. Here you can find an option called Video Quality. You need to tap on this setting. After that, you can choose between Standard and Higher. As usual, the Higher quality consumes more data than Standard. For your information, this setting might affect the download quality as well.
How To Change Hotstar Video Quality On Android And iOS?

It is possible to change the streaming quality of Hotstar video while playing the movie or web series. To get started, tap on the Settings button and select Video Quality from the popup window. By default, it is set to Auto. You need to expand this option and choose something else as per your requirements. You can select High, Medium, and Low. After that, Hotstar will start streaming the existing video in your chosen quality.
How To Change Prime Video Quality On Android And iOS?
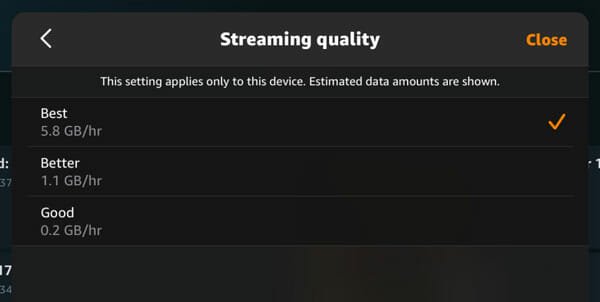
Amazon Prime Video offers the most number of options so that users can choose specific streaming and downloading quality as per the needs and bandwidth. To get started, tap on the My Stuff button and find out the settings gear icon. After tapping on the Settings gear icon, you should see an option called Streaming & Downloading. Tap on it and select a Streaming quality option. By default, it should be set to the Best. You need to choose something else according to your bandwidth capability.
That’s all! We hope these guides will be helpful to you.