Best Gboard Settings for Android and iOS
If you are using Android, you might have already used Gboard app, which is a keyboard app for Android. However, if you are an iOS user, you can download this app from the App Store. In simple words and straightforward way, Gboard is one of the best keyboard apps for Android as well as iOS. However, if you are just getting started with this app, you can check out these Gboard settings those will let you improve your productivity and let you use it in a better way. All these following tips and tricks are available for Android as well as iOS.
1. Language Selection

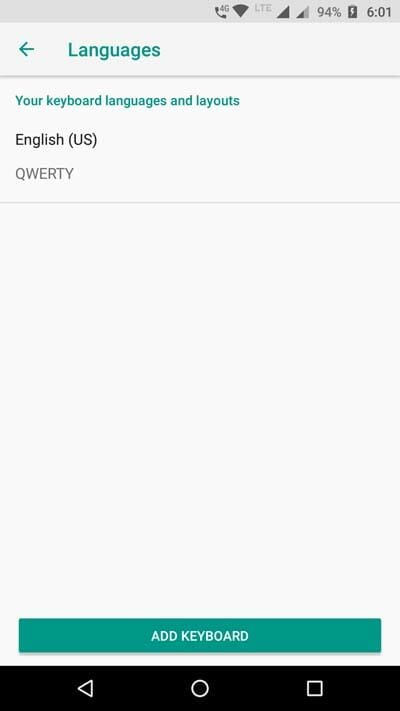
Language selection is the best thing you can have in your Gboard keyboard. In simple words, you can choose various between various keyboard languages including different regional languages like Hindi, Bangla, Marathi as well as Acehnese, Albanian and so on. The list is pretty huge and you can choose anything you want. Another very handy feature is you can choose different keyboard layout. For example, you get QWERTY keyboard by default when you install the Gboard app in your mobile. However, if you want, you can get HANDWRITING, QWERTZ, AZERTY and so on. You just need to choose among these settings. The change will take place almost immediately. To choose a different language, you need to head over to the Languages tab. Following that, you can tap on the ADD KEYBOARD button. Therefore, you will get all the languages and you can select anything you want from the corresponding list.
2. Change Theme

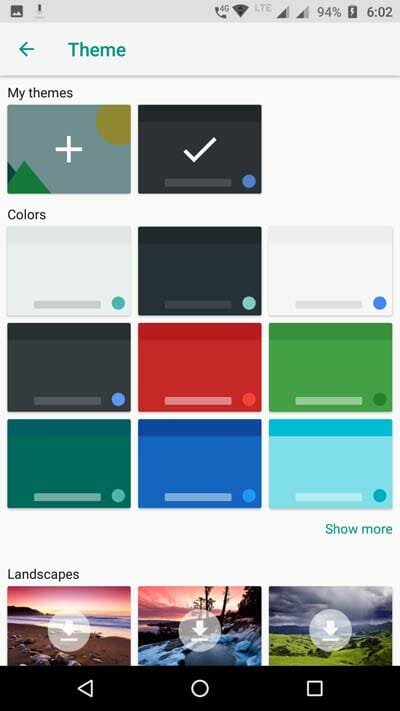
Previously, people installed Swiftkey and many other third-party keyboard apps just to get swipe feature and theme. However, now you can get various themes in the Gboard app itself. This keyboard app for Android and iOS offers a couple of themes so that you can customize it according to your requirements. The default theme is neat and clean. However, there are many people, who do not like to use the default theme and therefore, they can have a different one whenever needed. As of today, you can get almost 16 two colour themes and 12 landscapes. Although landscapes in the keyboard background look quite messy, you can activate that if you want. The best thing is if you already have a theme in your SD card or internal storage, you can activate that as well. To get started with the theme, you can open the Theme settings. Following that, you will get an option to choose your desired theme.
3. Preferences

Gboard is popular because of many reasons. People use it because of themes, easy typing, as well as countless number of settings. It has a dedicated section where you can find all the required options to manage your keyboard. It doesn’t matter whether you want to enable voice input key or not or enable one-handed mode or not, you can certainly do that with the help of this simple section of Gboard. This option is available regardless of the platform you are using right now. Talking about available options, you will get these:
- Enable/disable number row
- Show emoji switch key
- Show language switch key
- Voice input key
- Show emoji in symbols keyboard
- One-handed mode
- Keyboard height
- Sound on keypress
- Vibrate on keypress
- Popup on keypress
- Long press for symbols
- Key long press delay
All those things are readily available and you can get them right from the Preferences tab.
4. Glide Typing

People who type a lot, often get aches in their thumbs. To get rid of that problem, you can enable glide typing. In simple words, if you enable glide typing, you no longer have to press particular keys to write down a word. Instead, you can swipe through the words to type a word. For example, if you want to type SCHOOL, you need to glide through S, C, H, O, L. If you use this feature for the first time, it will consume a lot of time to write down a word through gliding. However, once you use it for a couple of days, you will find it better than typing. If you want to enable glide typing, open up the Glide typing option included in the Gboard app. Following that, toggle the button that says Enable glide typing. It comes with three more options and those are Show gesture trail, enable gesture delete and enable gesture cursor control. You can find all those options on the same page.
5. Text Correction

When you are a new language, you should have a text correction tool so that you can write down the correct words all the times. Gboard allows you to have the option so that you can get corrected texts always. There is another section called Text correction that has the following options:
- Show suggestion strip
- Next-word suggestions
- Block offensive words
- Show emoji suggestions
- Suggest contacts
- Personalized suggestions
- Auto-correction
- Autospace after punctuation
- Auto-capitalization
- Double-space period
- Spell check
You can enable or disable all the settings whenever needed. Just open up the Text Correction panel and toggle the corresponding buttons.
That’s all! These are some of the few tricks you can use when you are getting started with Gboard for Android or iOS. Although these options are very common in the Gboard app, most of the people often overlook them. Therefore, if you haven’t got these settings earlier, hope you can find them now.